
The most important step of online shopping is the checkout process. It is crucial because a bad checkout experience could be the reason for multiple abandoned carts. So how can we simplify checkout on our WooCommerce store? By enabling WooCommerce guest checkout!
Guest checkout is the most common type of checkout. It enables guests to check out your store without having to create an account or complete registration. Why is this favorable? Because it saves time, which leads to customer satisfaction.
WooCommerce is a flexible eCommerce platform that provides unlimited customization options. In this article, we will guide you on how to enable WooCommerce guest checkout with and without plugins. Let’s get started!
Related Article: Best WooCommerce Checkout Plugins for Smooth Checkout Process
Enable Guest Checkout Without Plugin
If you don’t want to overload your site with additional plugins or extensions, you can easily enable guest checkout on your WooCommerce website manually. Follow for step-by-step instructions below:
- First, log in to your WordPress account and from there go to WooCommerce > Settings.
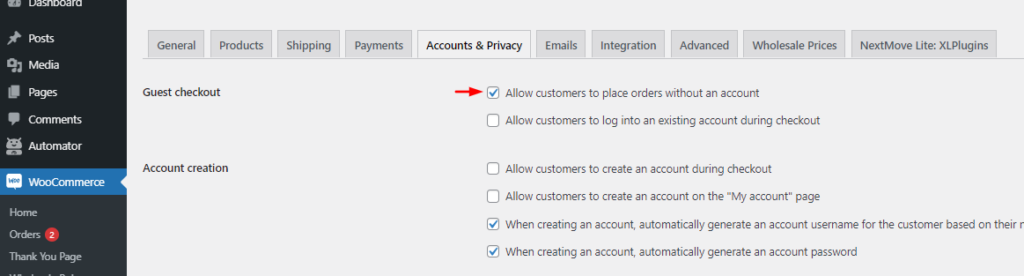
- Next, click on the “Accounts and Privacy” tab.
- On this page, you will find a “Guest Checkout” section. Click on the option “Allow customers to place orders without an account”
- Don’t forget to click on “save changes”
WooCommerce provides other options for checkout for guests. Let’s see what they are and how to enable them.
Recover carts and increase conversions with the best WooCommerce Abandoned Cart plugins
Login to Existing Account During Checkout
If you don’t want to enable guest checkout on your site but still want customers to browse your site without the need for an account, this is the perfect option for you. For this:
- First, log in to your WordPress account and from there go to WooCommerce > Settings.
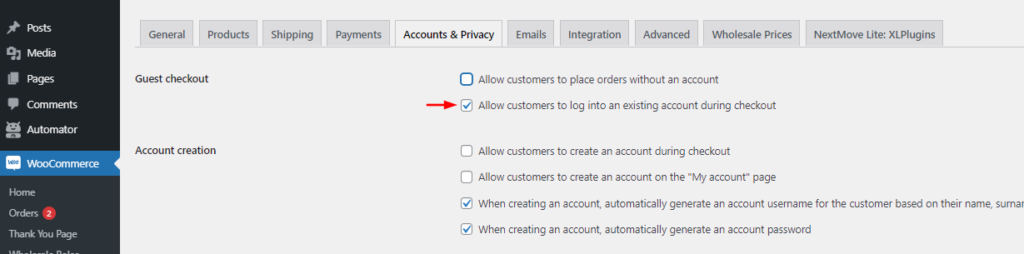
- Next, click on the “Accounts and Privacy” tab.
- On this page, you will find a “Guest Checkout” section. Click on the option “Allow customers to log in to an existing account during checkout”
- Don’t forget to click on “save changes”
Use our tips to Create High-Quality Content on your WooCommerce store
Customer Registration at Checkout
Similarly, there is also an option for guests to create a quick account on the checkout page. This will not hinder their browsing experience and will also enable you to capture customer information at the checkout page. For this:
- First, log in to your WordPress account and from there go to WooCommerce > Settings.
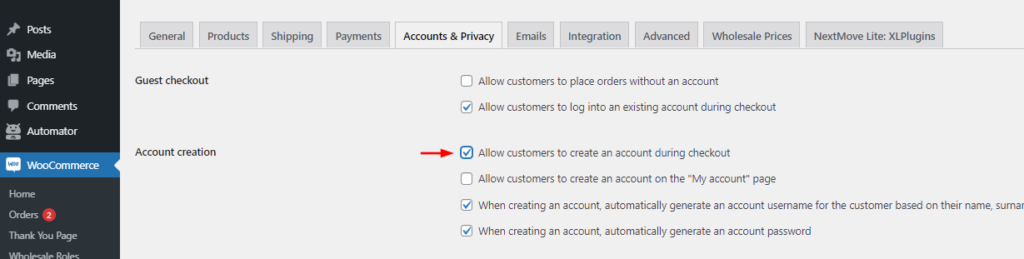
- Next, click on the “Accounts and Privacy” tab.
- On this page, you will find an “Account Creation” section. Click on the option “Allow customers to create an account during checkout”
- Don’t forget to click on “save changes”
Ease the shopping experience by learning how to Enable Repeat Orders on WooCommerce
Enable Guest Checkout Using a Plugin
If you want to add flair to your site, using plugins is the best way to do so. Now, you must be thinking, if we can enable guest checkout in WooCommerce with a click on a button, why do we need a plugin? Read on below to find out.
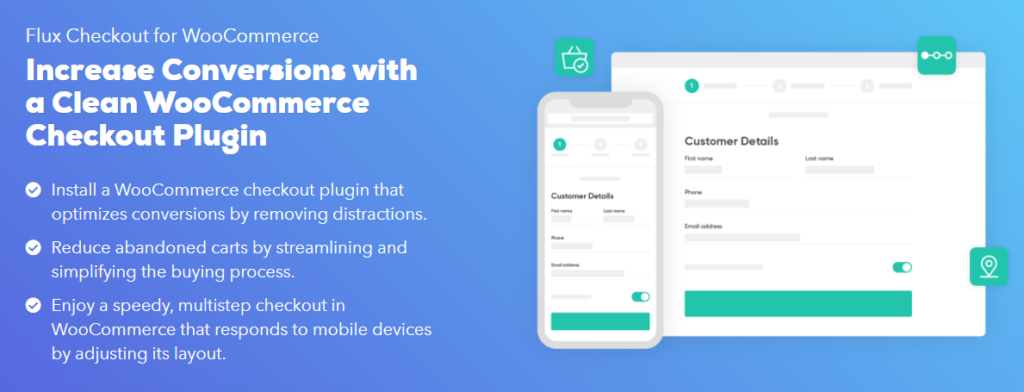
For this guide, we are going to use the Flux Checkout for WooCommerce plugin. This plugin helps in removing distractions, streamlining the checkout process, and increasing conversions. Also, It displays an app-like advanced multistep checkout to your customers and speeds up the filling-out process by giving prompts. Let’s set this up!
Step 1
First, you need to purchase the plugin from the Iconic store. Then go to WooCommerce > Plugins > Upload plugin. Upload the zip file and then activate the plugin. You need to add your license key after activation.
Step 2
The next step requires you to do some changes in WooCommerce. To enable guest checkout, go to WooCommerce > Settings, and click on the “Accounts and Privacy” tab. In the “Guest Checkout” section, click on the “Allow customers to place orders without an account” option to enable guest checkout on your WooCommerce store. Click on “save changes” at the bottom of the page.
Step 3
Now with the Flux Checkout plugin, we will use it to customize the checkout process and design it to match your business style.
For this, go to WooCommerce > Flux Checkout. It opens up 3 tabs. The first tab is “General Settings”. Here you get options for enabling/disabling checkout for desktop users. You can also check the option for address autocomplete here.
In the Header tab, you can choose the header type, such as an image or text. You can also define the header text, font, font color, and font size. You can also add a custom color or gradient for the header background. Moreover, you can also change the “back to cart” link color.
In the last “Checkout Style” tab, you can customize the look of the checkout page. For example, you need to pick a color theme, either you can use material design palettes or choose a custom color scheme. Moreover, you also have to choose Primary colors which will be used for fields, radio buttons, checkboxes, progress bar. And Accent colors which will be used for buttons and links.
And that’s it! Your WooCommerce guest checkout page is completely customized and ready to go live. Don’t forget to save your changes and enables guest checkout.
Increase conversions by learning how to Customize WooCommerce Email Templates
Final Words
Either you use a plugin or you do the job manually, enabling guest checkout on your WooCommerce website is a good way to simplify the shopping process for users who don’t have the time to create their own account or don’t want to go through that hassle.
The advantage of using a plugin is that it also elevates the design of your checkout page, thus resulting in more conversions. Whereas the default WooCommerce checkout page is a little plain.


