
If you want to set up email logs on your WooCommerce store, you have come to the right place. Email logs help you keep track of all emails sent from your WordPress/WooCommerce dashboard to your customers or clients. This helps you deal with issues, legal complaints, and the status of the email.
There are many WooCommerce plugins available that can help you set up this feature on your store. In this article, we will teach you how to do just that with the help of a plugin.
Give your emails a professional look with the best WooCommerce Email Customizer plugins.
Advantages of Setting Up WooCommerce Email Logs
Now you must be thinking what’s the use of setting up email logs on your WooCommerce store. Any website, especially an online store, sends hundreds of emails in a day to their users/customers, such as welcome, thank you, order confirmation, shipment tracking, password change, user change, and much more. Keeping a track of these emails is crucial to run your business smoothly.
One of the reasons why email logging can help your business is that you would be aware of the email status, so whenever a customer claims to not receive the email, you can verify that claim. Similarly, you would also be aware of which team member received what email. You can also tackle similar bugs, like if an email plugin is working correctly or not. Moreover, you can also instantly receive notifications if any order form or newsletter subscription is filled out.
The only way you can ensure a smooth email service is by using an SMTP service provider. These services help in checking on email delivery and making sure the email you sent is working or not. They also help in tracking user activity and see if an email was sent or opened and what action the customer took.
As you can see, setting up email logs on your WooCommerce store can be highly useful. Read on below to learn how to set this feature on your site.
Easily manage transactions on-site with the best WooCommerce Payment Gateways.
How to Set Up Email Logs in WooCommerce
We are going to use the WP Mail SMTP plugin that enables you to send, block, track, and authenticate emails easily.
Step 1: Install and Activate Plugin
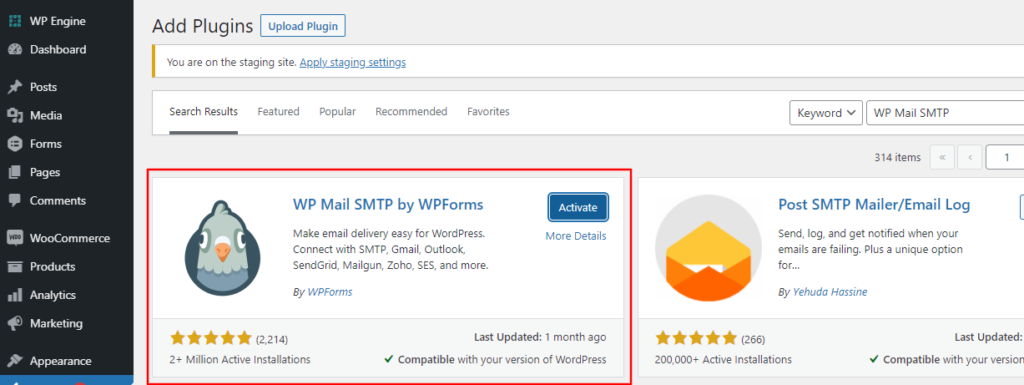
First, go to WooCommerce > Plugins > Add new, search for the plugin and then install and activate it. After activation, go to WP Mail SMTP > Settings, in the “General” tab, add the license key that you will get from your WP Mail SMTP account. Click on “verify key”.
Step 2: Configuration
The first step in the configuration is selecting the Mailer you would be using. The WP Mail SMTP works with service providers like Gmail, Outlook, Mailgun, SendGrid, etc. The default mailer is a PHP mailer, but you can not be sure if your emails are sent to users or collected in the spam folder, thus it’s not reliable.
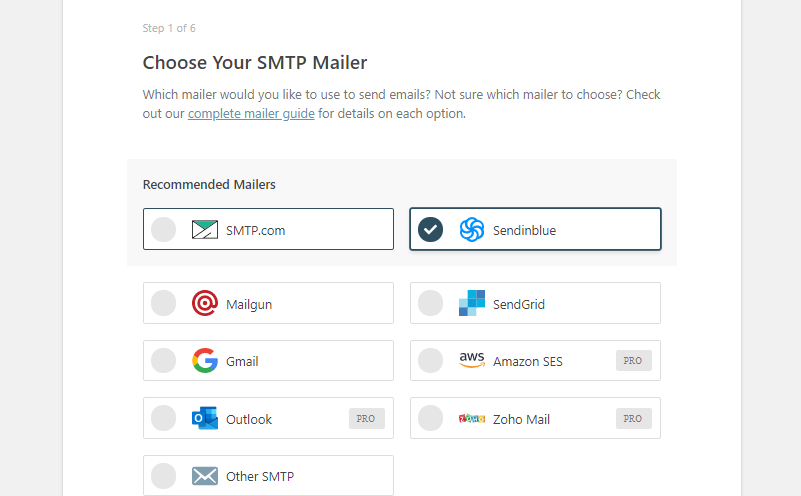
By choosing other SMTP mailers, you would have to fill in information like SMTP Host, encryption, SMTP Port, SMTP username, and password. Click on “save settings” once all information is filled out.
Step 3: Enable Email Log Feature
For this, go to the WP Mail settings page and click on the “email log” tab. There you will find a checkbox with the option “Enable log”, click on it. Now you can record and keep track of all your emails. It records email content such as date and time sent, email status, number of attachments, mailer options, and more technical details.
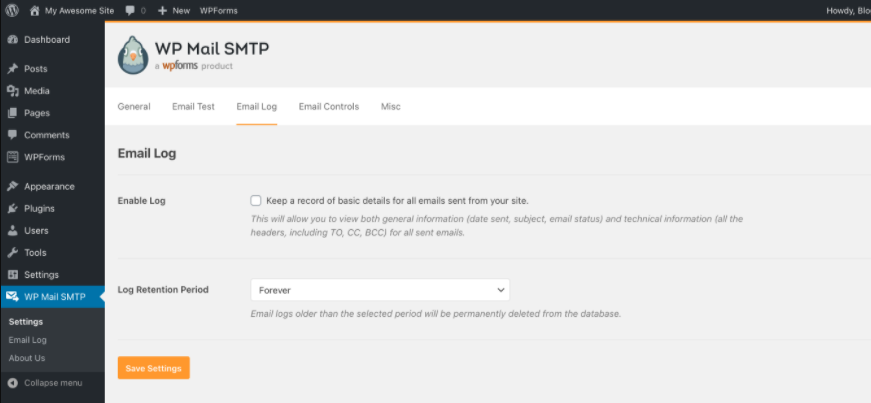
Once you click on the enable log option, another option will appear, the “Log Email Content”. it saves all the content of the email sent from your site as plain text, which will not be encrypted. This is an optional setting and you don’t need to enable it to enable email logging on WooCommerce. Click on the “save settings” button to save changes.
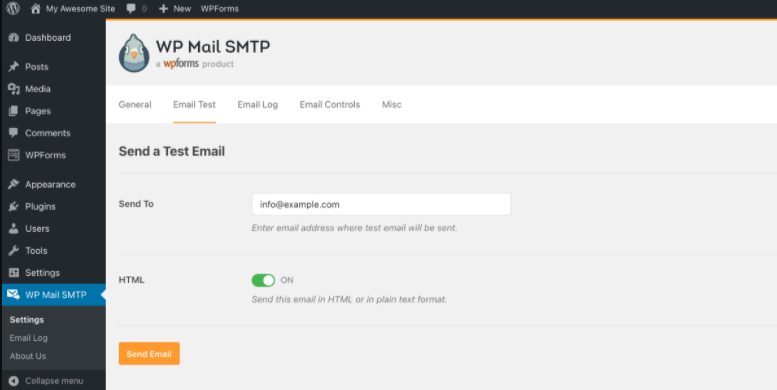
Step 4: Testing the Plugin
Now you need to test your plugin. For this go WP Mail SMTP > Settings and click on the Email Test tab. There add your email address and click on the “send email” button.
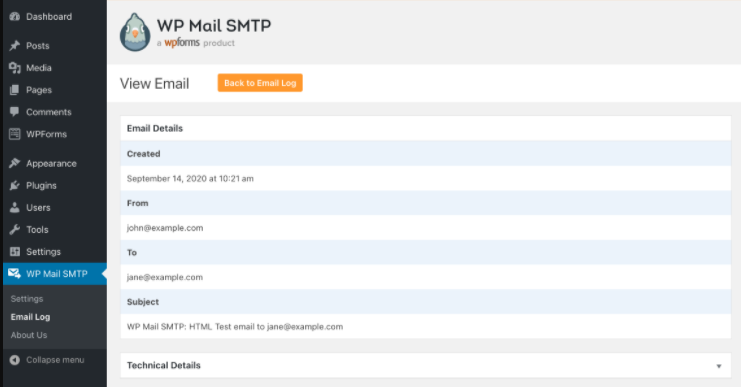
Now go to the WP Mail SMTP > Email log page. There you will find a list of all the emails that have been sent since the plugin was activated. You can also see the test email, click on “view” and a new page will appear which will show complete detail of the email.
You can also delete email logs in bulk. Moreover, you also search for emails by email address or content.
Get insight on store metrics with the best WooCommerce Reporting and Analytics plugins.
Wrap-Up
And that’s it! I hope this article was easy enough for you to learn how to set up email logging on your WooCommerce store with the help of a plugin. Check out similar articles on our site.


